
Red Hat blog
At Red Hat, all of our instant internal messaging is done through IRC. Because of this, many of our channels have a couple bots in them that do things like process links, report new pull requests, and keep track of users' karma. What's cool is that a lot of these bots are actually developed and running on OpenShift, so let's look at how you could get your own IRC bot running in OpenShift Online V3.
For this project, we'll be using the Cinch IRC Bot Framework, which is written in Ruby. I chose it because it's a popular framework with lots of open-sourced plugins already created and because I've never used Ruby before. So now that we have our platform and framework, let's get started! For the purpose of this post, I'll assume you've never used OpenShift or Cinch, but have a basic understanding of Git and Ruby (or, in my case, Google).
- Step 0. Create your Git repo
- Step 1. Install the Cinch gems
- Step 2. Create config.ru
- Step 3. Start your OpenShift project
- Step 4. Add a build hook
- Step 5. Try it out!
Step 0. Create your Git repo
The first step in any great project is to create the Git repo. So make a new repo on GitHub and call it whatever you want your bot to be named. Then clone it to your local environment.
Step 1. Install the Cinch gems
Create a Gemfile withe the following:
source 'https://rubygems.org'

gem 'rack'

gem 'cinch'
Then run bundle install in the source directory to create a Gemfile.lock file that will tell OpenShift which gems to use.
Step 2. Create config.ru
This is the file that OpenShift will actually try to run to start your application, so create a file called config.ru with the following contents:
require 'cinch'bot = Cinch::Bot.new do
  configure do |c|

    c.server = "irc.freenode.org"

    c.nick = "OpenShiftBot"

    c.channels = ["#openshiftbot"]

endon :message, "hello" do |m|
m.reply "Hello, #{m.user.nick}"
end
endbot.start
(This is just the main Cinch example slightly modified)
Let's look at what we're doing in this code (or skip to Step 3 if you don't care):
require 'cinch'
This is going to include the Cinch framework
bot = Cinch::Bot.new do
Creates our new bot object
configure do |c|
c.server = "irc.freenode.org"
c.nick = "OpenShiftBot"
c.channels = ["#openshiftbot"]
end
This configures the settings for our bot, and is pretty self-explanatory. We'll be joining the #openshiftbot channel on irc.freenode.org, with the nick "OpenShiftBot".
  on :message, "hello" do |m|

    m.reply "Hello, #{m.user.nick}"

  end
Here's the fun part: actually making our bot do stuff! on :message, "hello" do |m| listens for a user to say "hello", then uses the resulting Message object to reply to whomever initiated the greeting.
endbot.start
Ends the bot declaration and start running it.
Now that we have our basic code, let's commit and push it to our GitHub repo:
git add .

git commit -m "Basic code"

git push
Step 3. Start your OpenShift project
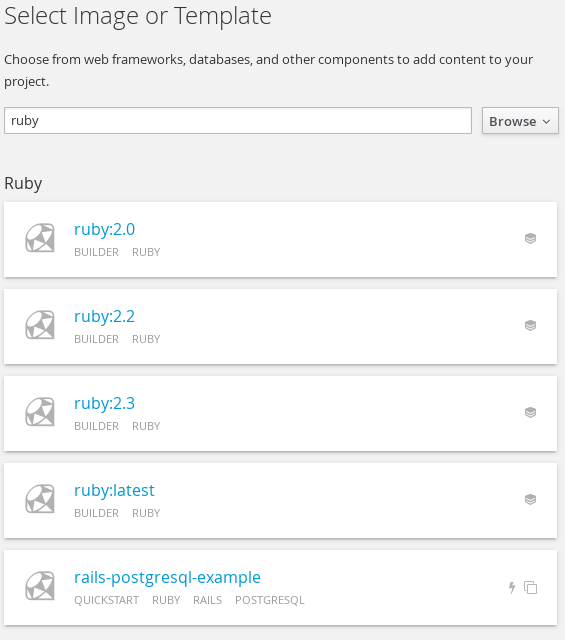
Now for the main purpose of this post, getting our bot to run on OpenShift! To do this, log in to your OpenShift Online Developer Preview account and create a new project. For a template, choose ruby:latest.
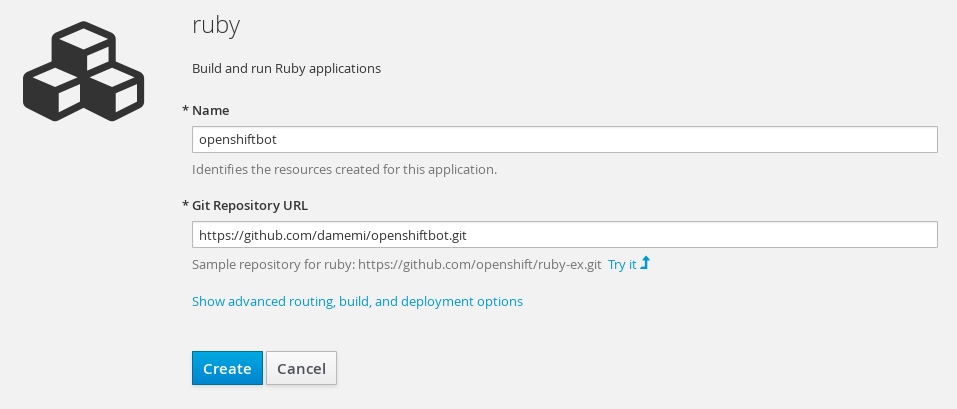
 Now give your bot a name and paste the link to your GitHub repository.

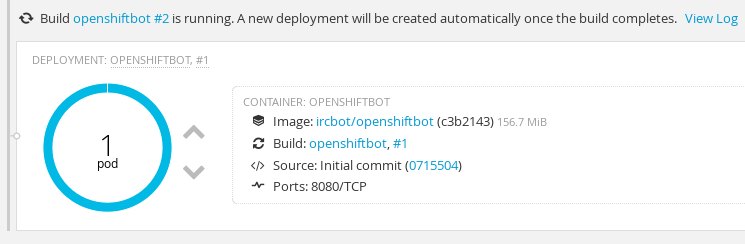
Continuing back to the Overview page, you should see that a build of your project has started:

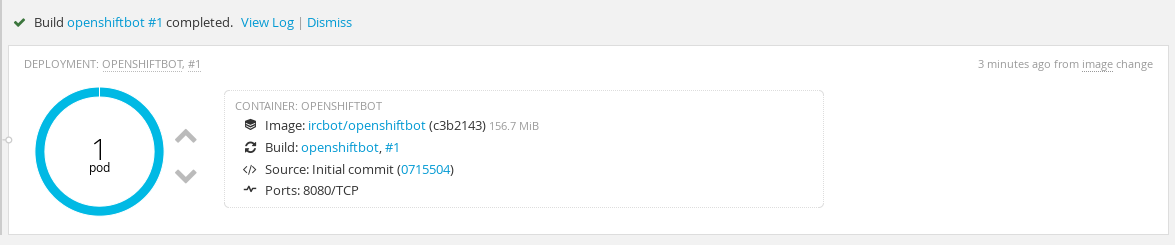
When the build finishes, a new deployment will start. If everything goes smoothly, you should see this once it's all done:

And in #openshiftbot on Freenode, you should see something like this:
 Congratulations! You're now running an IRC bot on OpenShift V3. But OpenShift is meant to do a lot cooler stuff than just host a running service forever. For example, we can...
Step 4. Add a build hook
Build hooks are a sweet feature of OpenShift that makes rapid development a breeze. If you were running this bot on a basic server, for example, every time you wanted to make a change you would have to push your code to GitHub, pull the changes to your server, and stop and restart the service yourself. With a build hook on OpenShift, all you need to do is push your code and OpenShift will pull the changes, build a new image, shut down your old service, restart your new service, and do it all with minimal downtime. Here's how we can do that.
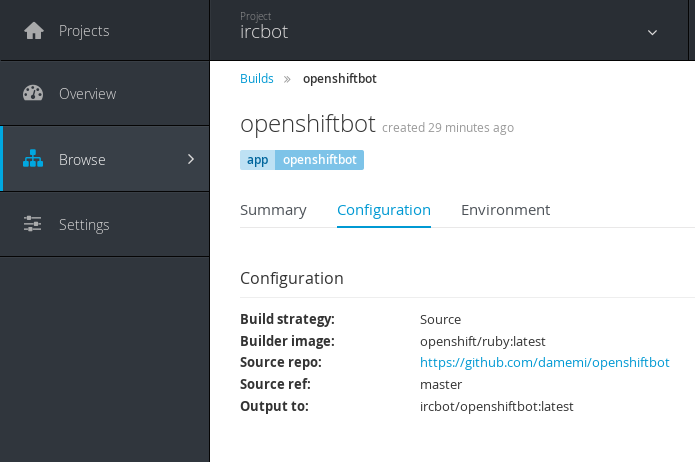
First, choose the build you just created:

Then go to the "Configuration" tab:

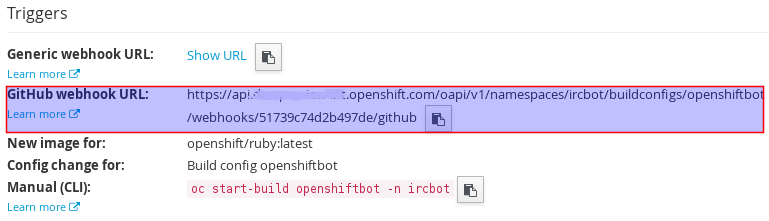
And on the right, under "Triggers" click to show the GitHub webhook URL and copy it to your clipboard.

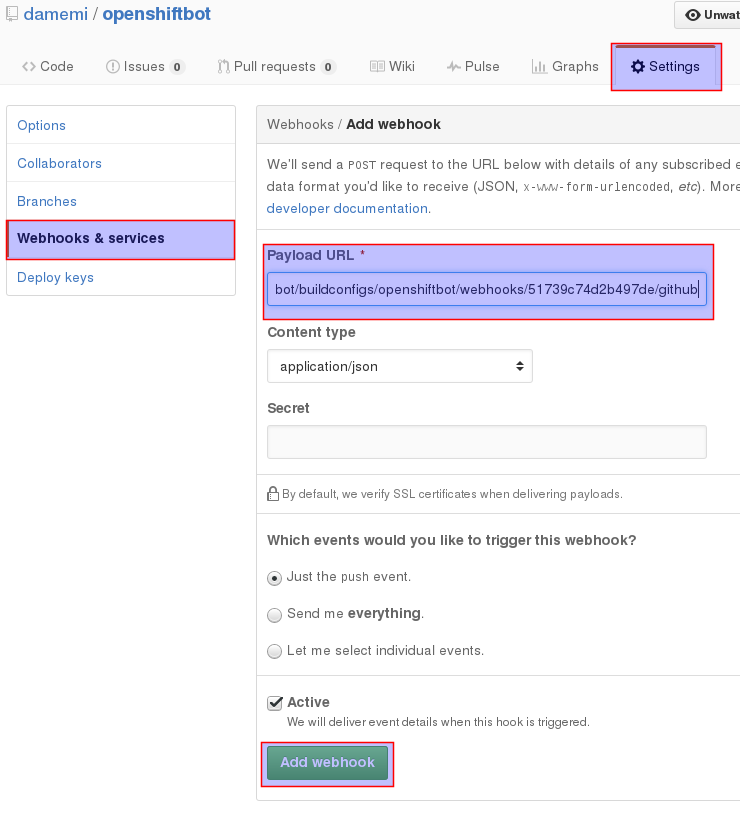
Now go back to your project page on GitHub and go to Settings > Webhooks and Services. Click Add Webhook and under "Payload URL" paste the link you just copied and finally click "Add Webhook".

Now when you push your code to GitHub, your project will automatically update. Nifty!
5. Try it out!
Let's update our config.ru file to make our bot a little more friendly. Edit the lines where we defined our message listener like so:
  on :message, "hello" do |m|

    m.reply "HOWDY, #{m.user.nick}!!!"

  end
Commit and push to GitHub, go back to the OpenShift Web Console and you'll notice that a new build has automatically started:

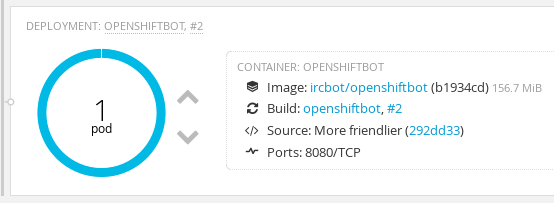
And when the build and deploy are done, you'll see that a new "deployment #2" has been created, your old pod has been scaled down, and your new commit message shows up:

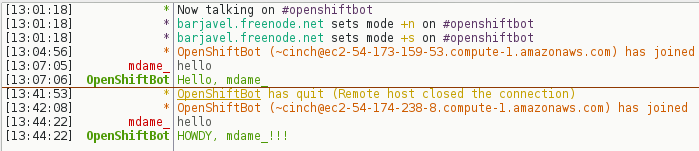
During this process, OpenShiftBot will temporarily disconnect from IRC as the old pod is scaled down, but it will automatically reconnect as the new pod is scaled up. Now, in our IRC channel, our bot is much more excited to see us:

Woohoo!