Red Hat blog
When using OpenShift, there are a number of different ways that you can add an application. The main methods are:
- Deploy an application from an existing container image.
- Build and deploy from source code contained in a Git repository using a Source-to-Image builder.
- Build and deploy from source code contained in a Git repository from a Dockerfile.
This blog will cover how to deploy an application from an existing container image using the OpenShift web console. The second part of the series will cover deploying from the command line using oc.
Deployment with the Web Console
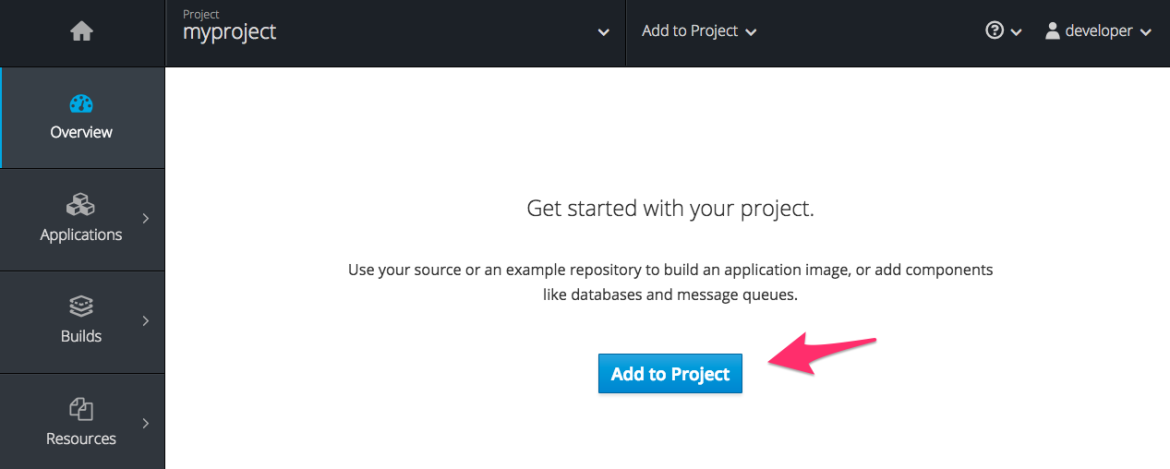
In a new project, select the Add to Project button in the center of the page.
You should be presented with the catalog browser.
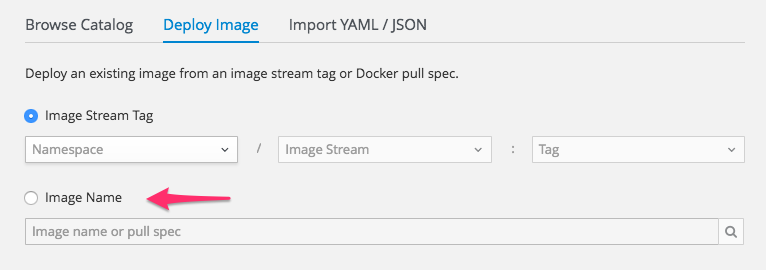
For deploying an application from an existing container image, you need to switch to the Deploy Image tab.
If applications had previously been deployed in this project, or you were not on the project Overview page, you could also use the Add to Project drop-down menu in the top menu bar and select Deploy Image.
When you are deploying an application from an image, there are two choices.
The first choice is to select an image by specifying its Image Stream Tag. This option would be used where the image has previously been imported into the OpenShift cluster, or has been built within the OpenShift cluster from a Dockerfile or using Source-to-Image.
The second choice is to specify the Image Name, where the image resides on an external image registry. This can be the Docker Hub Registry, or any other accessible image registry.
For this example, the application image we are going to deploy is being hosted on the Docker Hub Registry. You should, therefore, select the Image Name option.
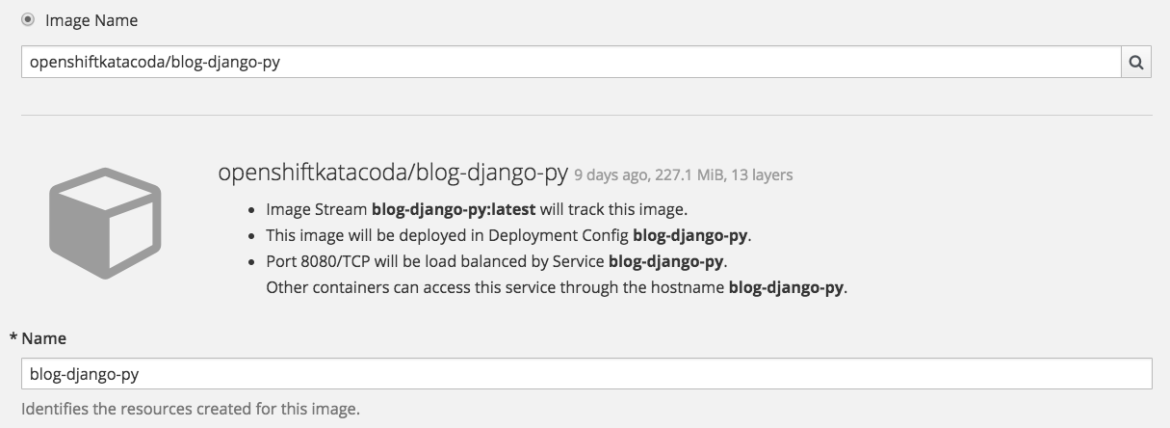
In the field saying Image name or pull spec, enter:
openshiftkatacoda/blog-django-py
Press Enter, or click on the magnifying glass to the right of the field. This should trigger a query to pull down the details of the image from the Docker Hub Registry, including information on when the image was last updated, the size of the image, and the number of layers.
From the name of the image, the Name field will be automatically populated. This name is used in OpenShift to identify the resources created when the application is deployed. This will include the internal Service name used by other applications in the same project to communicate with it, as well as being used as part of the default hostname for the application if exposed externally to the cluster via a Route.
In this example, leave the Name field as blog-django-py. For your own application, you should consider changing this name to something more appropriate.
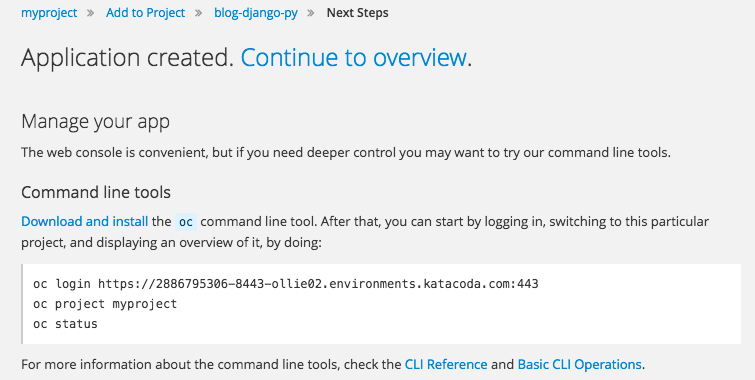
When you are ready, at the bottom of the page, click on Create. This will take you to a splash page confirming that the application deployment is occurring.
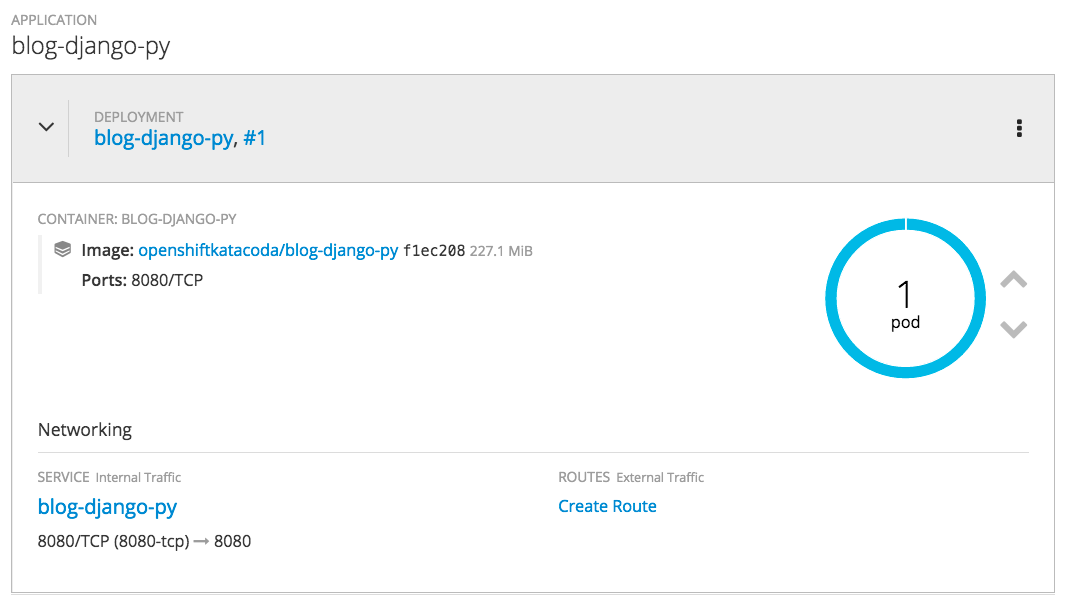
Click on Continue to overview and you will be returned to the Overview page, where you can view the details of the application that was created and monitor its progress as it is deployed. When deployment is finished, you should see something like the following screenshot, giving the name and status of your first pod.
Creating an External Route
Whenever you deploy any application from an existing container image using the Deploy Image page of the OpenShift web console, it will by default only be visible internally to the OpenShift cluster, and usually only to other applications within the same project.
If the application is a web application and you need to make it visible outside of the OpenShift cluster so users can access it, you'll need to expose it via a Route.
That an application is not visible and may need to be exposed to be visible can be determined from the Overview page for a project and the details of the application displayed. In particular, if the application is not being exposed, then Create Route will be displayed to the right of the application name.
Routes can be used to expose any application which communicates over HTTP. OpenShift can handle termination for secure HTTP connections, or a secure connection can be tunneled through direct to the application, with the application handling termination of the secure connection. Non-HTTP applications can be exposed via a tunneled secure connection if the client supports the Server Name Indication (SNI) extension for a secure connection using Transport Layer Security (TLS).
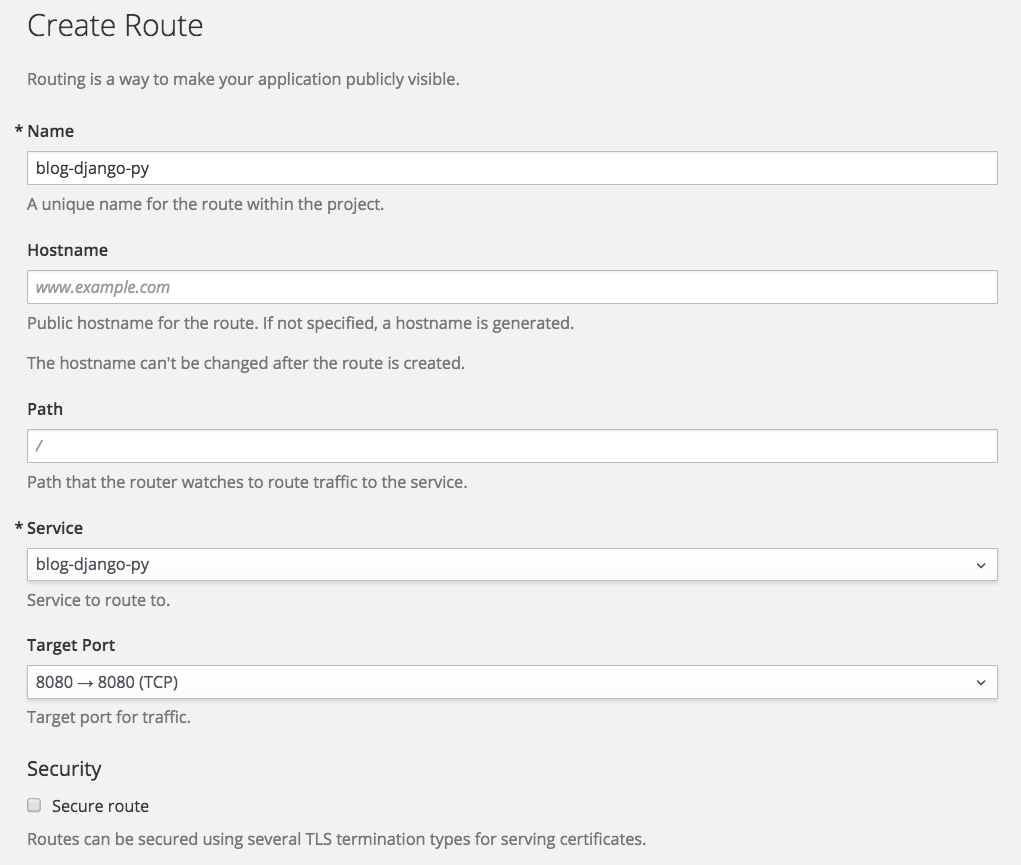
To expose the sample application you have deployed, click on Create Route. This will display a page for entering the route details.
If you do not modify any of the pre-populated values, OpenShift will automatically assign a hostname for the application as a subdomain of the hostname for the OpenShift cluster.
To override the hostname, you can modify the Hostname field. For this to work, you would need to control the DNS which has delegated authority for that hostname, and you'd need to be able to set up a CNAME (Canonical Name record) for the hostname mapping to the hostname for the OpenShift cluster's router.
No matter what port the application listens to internally to the OpenShift cluster (port 8080 in this case), the external route will use port 80 for the standard HTTP connection, and the standard port 443 for a secure HTTP connection (https).
Before creating the route, ensure that the app label is listed with the value blog-django-py. Add this label if it's not present, as it will be used later.
Leaving all other values as their defaults, click on Create and you will return to the Overview page for the project. Instead of Create Route, you should now see the URL by which the exposed application can be accessed from a web browser.
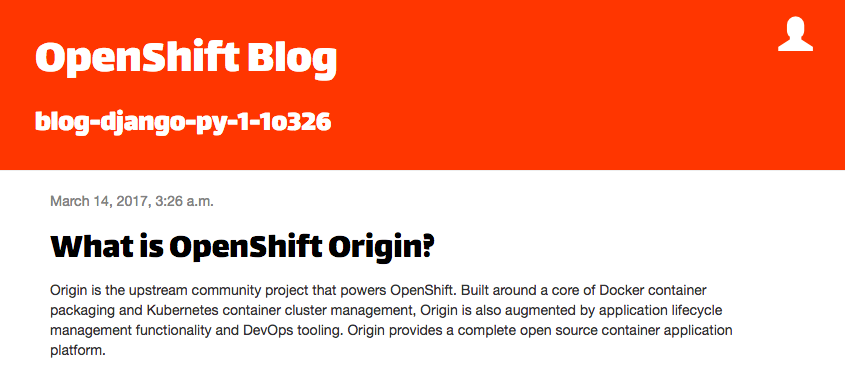
Click on the URL and a new browser window should open that shows the sample application.
Summary of Part One
In this blog, we went over deploying an existing container image in OpenShift by deploying an image directly from an external image registry. In the next part of this series, we will deploy the application again, but will use the command line tool oc. In the third part, we’ll follow this by importing an image into the OpenShift internal image Registry, and then deploying the image from the internal image registry.
Would You Like to Learn More?
This post is based on one of OpenShift’s interactive learning scenarios. To try it and our other tutorials without needing to install OpenShift, visit: https://learn.openshift.com
Do you have an OpenShift Online account? There's no reason to wait. Get your applications running in minutes with no installation needed. Sign up for the free trial of OpenShift Online.
What other topics would you like to see in the future on this blog? We're happy to make tutorials about anything that helps you with your OpenShift experience. Comment and let us know!

